Auto Clicker for Windows: Set Intervals, Repeats and Hotkeys
By Asoftech |
Clicking the same button over and over can interrupt otherwise productive work. An auto clicker for Windows turns that repeated input into a reusable routine. The useful starting point is a clear target, a suitable pause between clicks, and a simple way to stop.
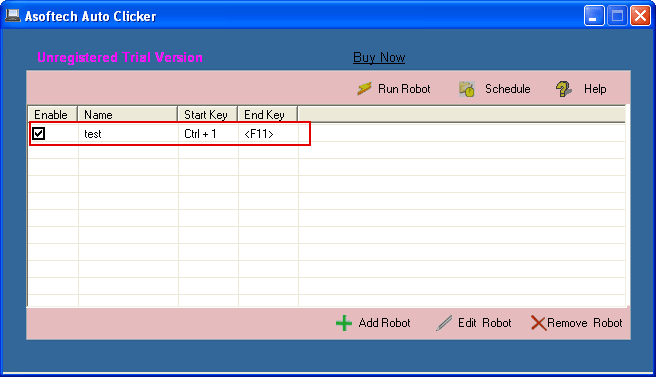
Asoftech Auto Clicker lets you save one click or a sequence of clicks as a robot, then start it with a keyboard shortcut. This guide explains how to set up a small, predictable routine before expanding it.
Good candidates include repeatedly pressing a control in a test application or stepping through a stable desktop demonstration. Choose a task where the target stays in a known position and the result is easy to inspect. For workflows that also need recorded typing, see the Asoftech Automation guide.
Asoftech Auto Clicker supports left clicks, right clicks, double clicks and click-hold actions. It also provides click intervals, repeat settings, start and stop shortcuts, and scheduling. Use only the options your first routine needs.
How to set up your first clicking routine
Prepare the target. Open the application and position its window. Start with a test task where extra clicks will not change important information.
Add a robot. Open Asoftech Auto Clicker and select Add Robot. Specify the point to click using the position controls.
Choose the action and interval. Set the click type and Click Interval, then add the click to the robot. Add more points only if the workflow needs them.
Limit the first run. Name the robot, choose a small repeat count, and set its start and stop keyboard shortcuts. Check that the robot is enabled for hotkey use.
Save and test. Save the robot, start it with your chosen shortcut, and watch the result. Test the stop shortcut before using a longer run.
Choose an interval the application can handle
A shorter interval sends clicks more frequently, but the target application still needs time to respond. Begin with a comfortable pause, such as one second, and adjust after observing a short test. This is a starting suggestion, not a guaranteed setting for every program.
The click interval controls the pause between actions; the repeat count controls how many times the robot runs. If a robot contains several clicks, one repeat means the whole sequence, not just one click. A limited run is easier to check than continuous repetition.
Keep the routine reliable
If clicks miss the target, stop and check the window position, display scaling and selected coordinates. If a button responds slowly, increase the interval. If a shortcut does not start the robot, check its enabled setting and whether another application uses that key combination.
Recheck the routine after a layout change. Scheduling is useful once a task works consistently; first confirm that the intended application and screen will be ready when it starts.
Frequently asked questions
Can I click more than one location?
Yes. A robot can contain multiple click actions. Add the points in the required order and test the complete sequence.
How do I stop automatic clicking?
Use the stop keyboard shortcut configured for the robot. Keep it easy to remember and verify it during your first short test.
Can I use an auto clicker in games?
Check the rules of the specific game or service first. Support for mouse clicking does not mean automation is permitted or will work in every game.
Make repetitive clicking easier
Start with one task, a few repeats and an interval that gives the application time to react. Once the result is consistent, save the routine for reuse. Review the official product page for features, system requirements and trial options.